
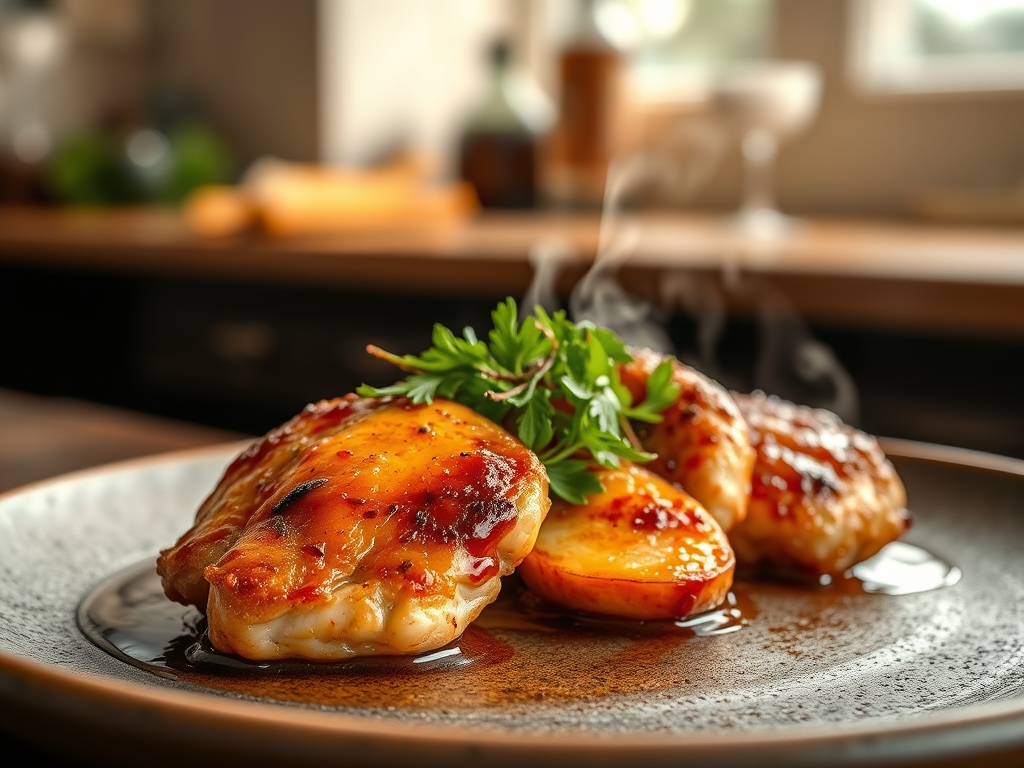
Imagine the scent of a heavy cast iron skillet meeting cold butter; that distinctive, nutty aroma that fills a room before the first bite even happens. When you are hunting for authentic longhorn steakhouse chicken recipes, you are really chasing two things: that specific, crusty char and a center so juicy it feels illegal. It is the gold standard of casual dining comfort.
Most home cooks struggle with chicken because it is a fickle protein. It goes from raw to rubbery in a matter of seconds. But we are going to change that. By treating your kitchen like a laboratory and your ingredients like high-performance fuel, we can replicate that signature "Longhorn" profile. We are talking about deep caramelization, a piquant marinade that penetrates to the bone, and a finishing glaze that clings to the meat like silk. Grab your apron and your favorite heavy-bottomed skillet; we are about to turn your kitchen into the best steakhouse in town.
The Gathers:
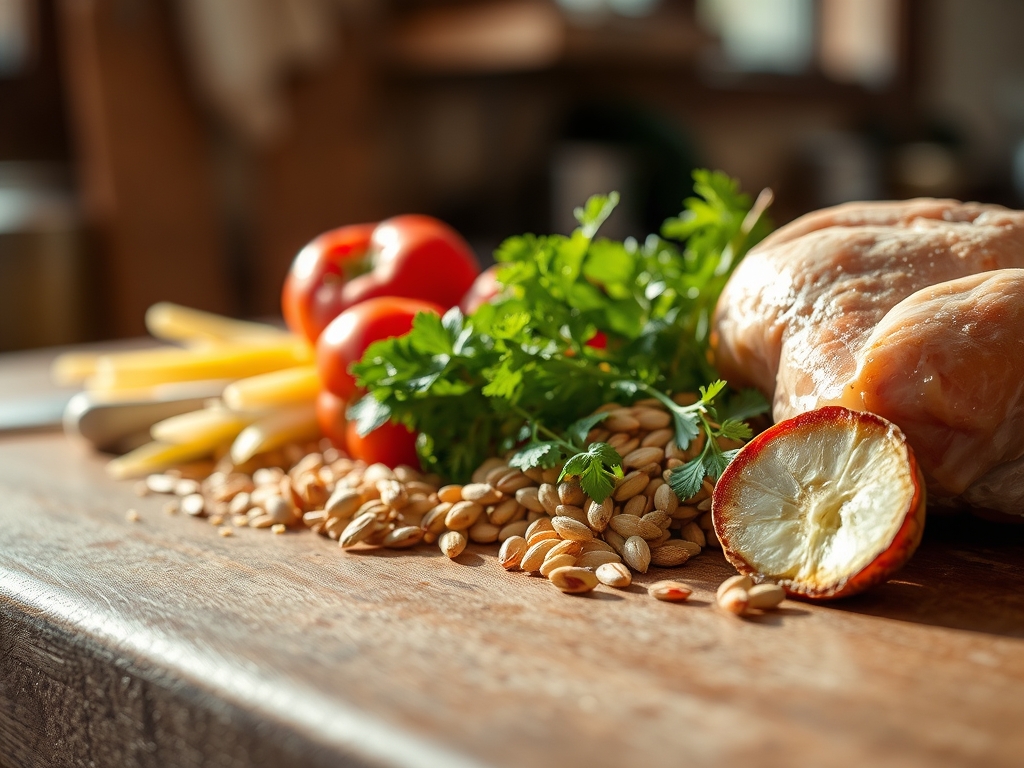
Setting up your mise-en-place is not just about being organized; it is about controlling the chemistry of your meal. For these longhorn steakhouse chicken recipes, you need a foundation of high-quality proteins and specific aromatics. Start with six-ounce chicken breasts. Why six ounces? It is the ideal thickness for heat to penetrate the center before the exterior overcooks.
You will need a high-smoke-point fat like avocado oil or clarified butter to handle the searing temperatures. For the marinade, gather fresh garlic, smoked paprika for that "open flame" depth, and a dash of Worcestershire sauce to provide a savory, viscous base. Use a microplane to zest a fresh lemon; the oils in the zest provide a bright, citrusy lift that cuts through the richness of the salt and fat.
Smart Substitutions: If you are watching your sodium, swap the Worcestershire for coconut aminos. It provides the same dark color and umami punch without the salt spike. If you do not have a grill, a heavy-bottomed skillet or a cast iron pan is your best friend for achieving that Maillard reaction. Use a digital scale to ensure your spice rub ratios are exact; precision is the difference between "good" and "legendary."
The Clock: Chef's Flow
Efficiency in the kitchen is all about the "flow." You cannot rush the science of protein denaturation.
Prep Time: 15 minutes. This includes your knife work and whisking the marinade.
Marinating Time: 30 minutes to 4 hours. Do not exceed 4 hours, or the acid will begin to "cook" the chicken, resulting in a mealy texture.
Cook Time: 12 to 15 minutes.
Resting Time: 5 to 8 minutes.
The "Chef's Flow" means you are prepping your side dishes while the chicken marinates. By the time your skillet is screaming hot, your workspace should be clear of everything except your tongs and a clean plate for the finished product.
The Masterclass:
1. The Surface Tension Prep
Pat your chicken dry with paper towels until the surface is matte. Moisture is the enemy of a good sear. If the surface is wet, the heat from the pan will go toward evaporating water rather than browning the meat.
Pro Tip: This is known as preventing "steaming." By removing surface moisture, you allow the Maillard reaction to occur immediately upon contact with the heat, creating that golden-brown crust we crave.
2. The Infusion Phase
Place your chicken in a glass bowl and pour over your marinade. Use a saucier to slightly warm your marinade if you are using solid fats like coconut oil; this ensures the liquid is homogenized before it hits the meat.
Pro Tip: Acidic ingredients like lemon juice or vinegar act as a denaturant. They break down the tough protein strands on the surface, allowing the spices to infuse deeper into the muscle fibers for a more flavorful bite.
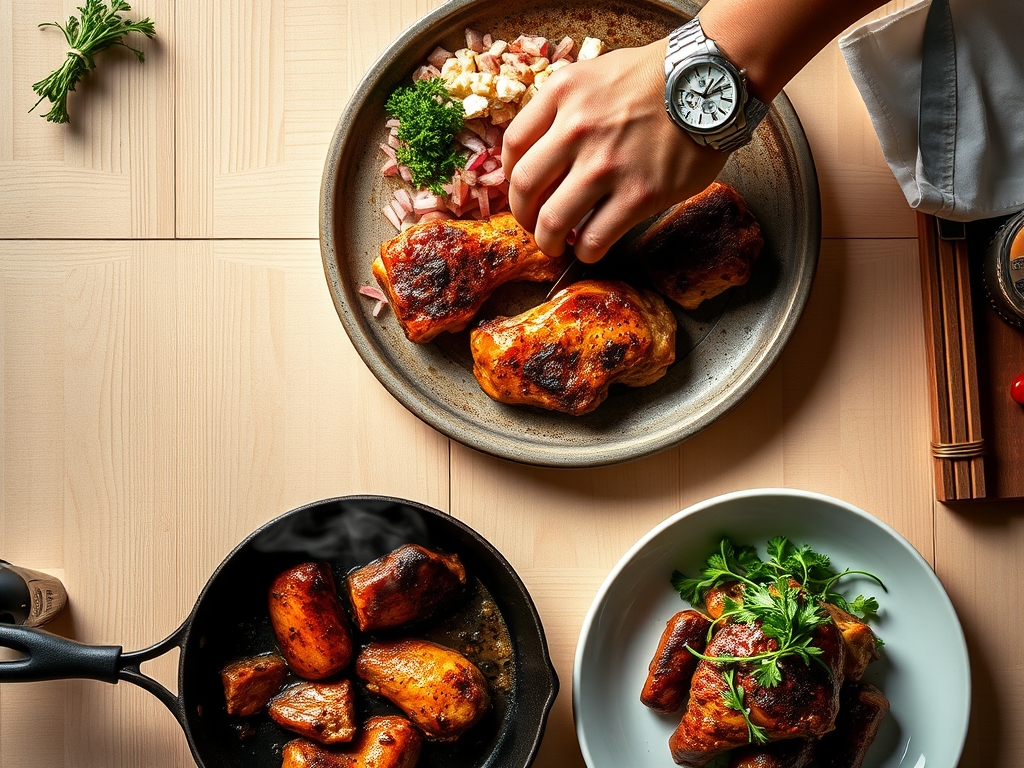
3. The High-Heat Contact
Heat your skillet until a drop of water dances and evaporates instantly. Add your oil, then lay the chicken away from you to avoid splashes. Do not crowd the pan; if you drop the temperature too fast, the juices will escape and your chicken will poach in its own liquid.
Pro Tip: This is the "Searing Phase." Professional chefs use conduction (direct heat transfer) to create a pressurized seal on the exterior, which helps lock in the internal moisture.
4. The Flip and Baste
Once a deep crust has formed, flip the chicken. Add a knob of butter and your crushed garlic cloves to the pan. Use a large spoon to continuously pour the hot, foaming butter over the chicken.
Pro Tip: This is called aromatic basting. The butter acts as a vehicle for the garlic and herb flavors, coating the chicken in a fat-soluble flavor layer that a dry rub simply cannot match.
5. The Internal Target
Use an instant-read thermometer to check the thickest part of the breast. You are looking for 160 degrees Fahrenheit. Yes, 160, not 165.
Pro Tip: This accounts for thermal carryover. Once you remove the meat from the heat, the internal temperature will continue to rise by about 5 degrees. Pulling it at 160 ensures it hits the perfect 165 without becoming dry.
6. The Essential Rest
Transfer the chicken to a warm plate and tent it loosely with foil. Let it sit for at least five minutes before slicing.
Pro Tip: During cooking, the muscle fibers tighten and push juices to the center. Resting allows those fibers to relax and reabsorb the liquid, ensuring the juice stays in the meat rather than running out onto your cutting board.
The Deep Dive:
Macro Nutrition: A standard serving of this steakhouse-style chicken provides roughly 35g of protein, 8g of fat, and 2g of carbohydrates. It is a powerhouse for muscle recovery and satiety.
Dietary Swaps:
- Keto: Keep the recipe as is; just ensure your marinade has no added sugars.
- Vegan: Use the same spice rub and marinade on thick "steaks" of cauliflower or firm tofu.
- Gluten-Free: This recipe is naturally GF; just double-check your Worcestershire sauce label.
The Fix-It:
- Problem: The chicken is burnt on the outside but raw inside. Fix: Your pan was too hot. Finish the chicken in a 350-degree oven to reach the target internal temp.
- Problem: The marinade is too salty. Fix: Add a teaspoon of honey or agave to the marinade to balance the sodium with sweetness.
- Problem: The chicken is sticking to the pan. Fix: You are trying to flip it too early. The meat will naturally "release" from the pan once the crust has properly formed.
Meal Prep & Reheating: To maintain "day-one" quality, reheat your chicken in a covered skillet with a tablespoon of water or broth. This creates a steam-room effect that rehydrates the protein without making the exterior soggy. Avoid the microwave if possible; it vibrates water molecules too violently, which toughens the protein.
The Wrap-Up:
You now have the technical blueprint for the ultimate longhorn steakhouse chicken recipes. It is not just about the ingredients; it is about the physics of the sear and the patience of the rest. When you combine high-quality tools like a heavy-bottomed skillet with scientific precision, you elevate a simple weeknight dinner into a culinary event. Go ahead, show off those grill marks and that perfectly rested, glistening chicken. Your kitchen, your rules!
The Kitchen Table:
How do I get that specific smoky flavor without a grill?
Use a high-quality smoked paprika or a tiny drop of liquid smoke in your marinade. This mimics the phenolic compounds found in wood smoke, providing that "fire-kissed" essence even when using a standard indoor stovetop or oven.
Why is my chicken breast always tough?
You are likely overcooking it or skipping the rest period. Always use a thermometer to pull the meat at 160 degrees. Resting for five minutes allows the fibers to relax, which is the secret to a tender, buttery texture.
Can I use frozen chicken for this recipe?
You can, but it must be fully thawed and patted dry. Frozen chicken often contains extra brine; if not dried properly, it will steam rather than sear, ruining the Maillard reaction and leaving the meat gray and rubbery.
What is the best oil for searing chicken?
Choose an oil with a high smoke point like avocado, grapeseed, or canola oil. Avoid extra virgin olive oil for high-heat searing, as it breaks down and turns bitter at the temperatures required for a proper steakhouse crust.