
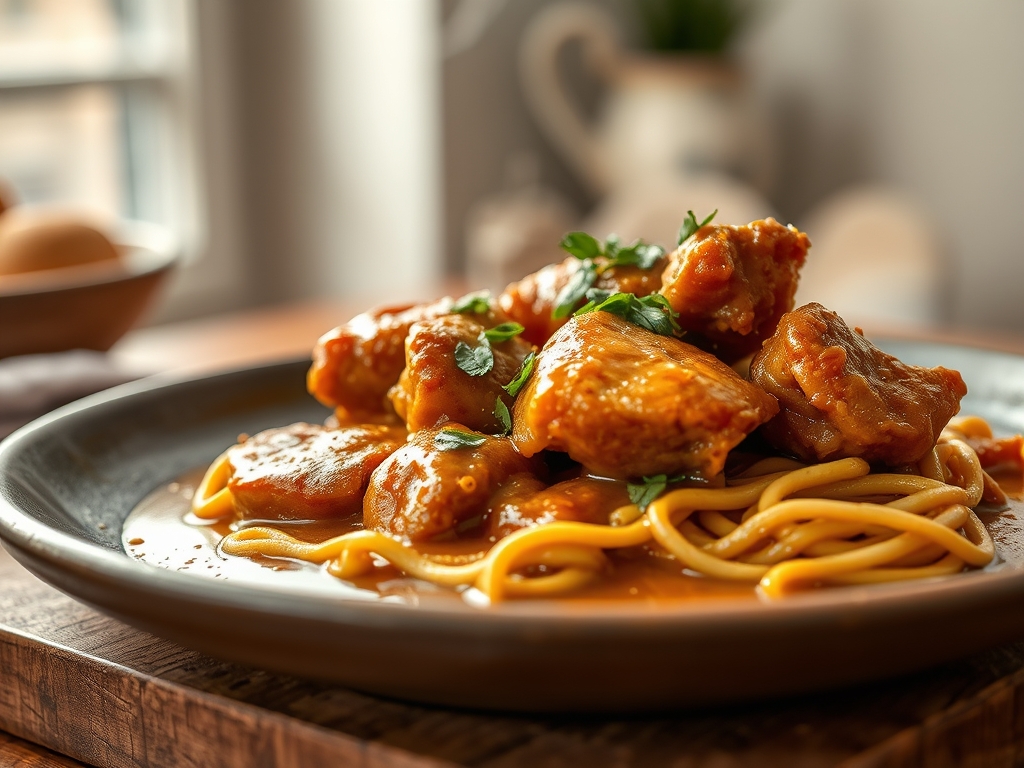
Picture the steam rising from a heavy bottomed skillet; it carries the scent of toasted butter and woodsy thyme. There is a specific, primal comfort in the sight of golden poultry submerged in a velvet sauce. When you search for the best gravy chicken recipes, you are looking for more than just a meal. You are seeking that perfect balance of salt, fat, and umami that defines home cooking at its absolute peak.
The secret to a truly transformative gravy does not lie in a packet or a jar. It lives in the chemistry of the pan. It is about the way amino acids react with heat to create a complex crust on the meat. It is about the way a cold whisked roux transforms thin stock into a viscous, glossed masterpiece. Today, we are going to strip away the mystery and look at the physics of the braise. We are going to turn your kitchen into a laboratory of flavor where every sizzle and bubble serves a specific purpose. Grab your favorite apron and let us dive into the mechanics of the ultimate comfort food.
The Gathers:
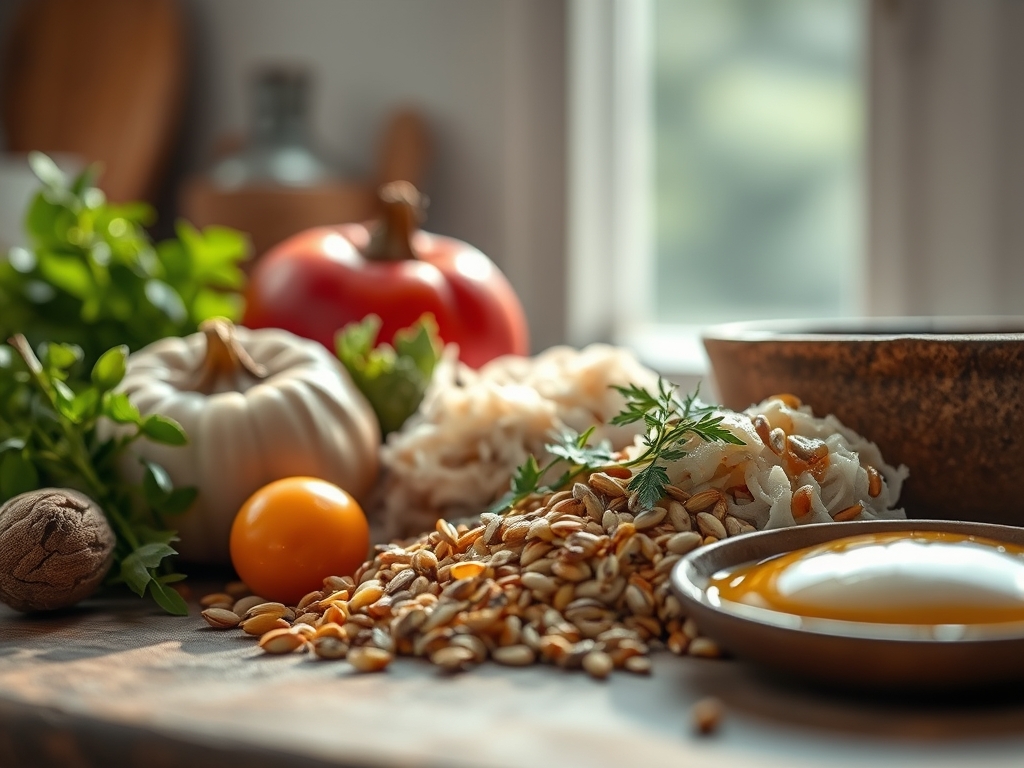
Before we apply heat, we must respect the mise en place. The foundation of this dish starts with high quality chicken thighs. Use bone in, skin on cuts if you want maximum collagen extraction; this provides a natural thickness to your sauce that boneless cuts simply cannot match. You will need a digital scale to measure your flour and butter precisely. A one to one ratio by weight is the golden rule for a stable roux.
For the aromatics, gather fresh garlic, shallots, and a bundle of herbs including rosemary and sage. Use a microplane to zest a hint of lemon at the end; this adds a piquant brightness that cuts through the heavy lipids. Your liquid base should be a fortified chicken stock. If you are using store bought, look for low sodium options so you can control the salinity yourself.
Smart Substitutions: If you are avoiding dairy, swap the butter for rendered duck fat or a high quality avocado oil. For a deeper flavor profile, replace half a cup of stock with a dry white wine like Sauvignon Blanc. The acidity helps to denature the proteins and brighten the overall palate. If you lack fresh herbs, use one third the amount of dried herbs, as their oils are more concentrated.
The Clock
Efficiency in the kitchen is about the Chef's Flow. This is the art of overlapping tasks so that no second is wasted while the pan is hot. Expect a total active time of twenty minutes, with a simmering window of thirty minutes.
Prep Time: 15 Minutes. This includes patting the chicken dry, which is non negotiable. Moisture is the enemy of the Maillard reaction. Use this time to mince your aromatics and measure your liquids.
Cook Time: 35 Minutes. You will spend ten minutes rendering fat and searing the protein. The remaining time is dedicated to the gentle reduction of the sauce.
Total Time: 50 Minutes. This allows for a five minute rest period at the end. Resting is vital; it allows the muscle fibers to relax and reabsorb their juices, ensuring the meat is succulent rather than stringy.
The Masterclass
1. The High Heat Sear
Place your chicken skin side down in a cold, heavy bottomed skillet, then turn the heat to medium high. This technique allows the fat to render out slowly, resulting in a crispier skin. Use tongs to press the meat down for even contact.
Pro Tip: This stage triggers the Maillard reaction. This is a chemical reaction between amino acids and reducing sugars that gives browned food its distinctive flavor. Without a proper sear, your gravy will lack the deep, toasted notes found in the best gravy chicken recipes.
2. Deglazing the Fond
Once the chicken is browned and removed, you will see brown bits stuck to the bottom of the pan. This is called the fond. Pour in your aromatics and a splash of liquid, using a wooden spoon or a bench scraper to lift those bits into the sauce.
Pro Tip: Deglazing is an act of solubility. The alcohol or acid in your liquid dissolves the caramelized proteins, integrating concentrated savory flavors directly into your base.
3. The Roux Foundation
Whisk in your flour directly into the rendered fat. You are looking for a "blond" roux. It should smell slightly nutty but should not turn dark brown.
Pro Tip: Cooking the flour for at least two minutes is essential to neutralize the amylase enzymes. If you do not cook the flour long enough, your gravy will have a chalky, raw aftertaste and may not thicken properly.
4. The Gradual Temper
Slowly incorporate your stock, one ladle at a time. Whisk vigorously after each addition to ensure the starch granules expand evenly without clumping.
Pro Tip: This creates a stable emulsion. By adding liquid slowly, you allow the fat and water molecules to bond with the starch, resulting in a silky, viscous texture that coats the back of a spoon.
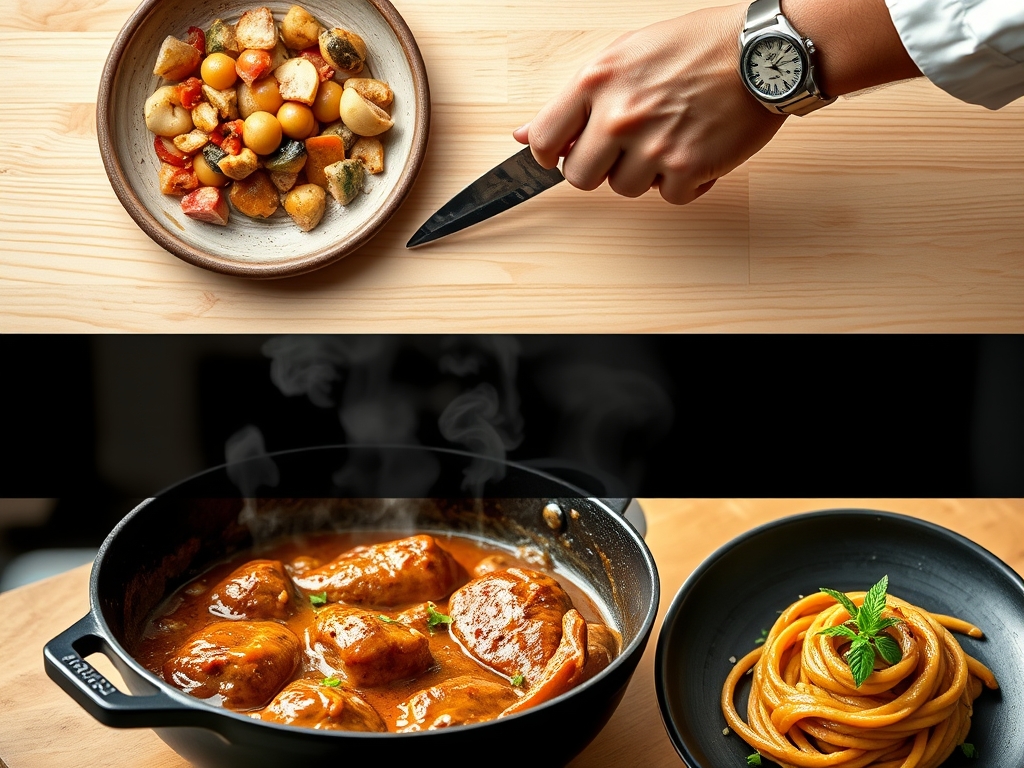
5. The Gentle Braise
Nestle the chicken back into the sauce, leaving the crispy skin exposed above the liquid line. Lower the heat to a bare simmer.
Pro Tip: This utilizes conduction and convection. The liquid cooks the bottom of the chicken gently, while the steam circulates to finish the top. This prevents the meat from overcooking and becoming tough.
6. The Final Infusion
Just before serving, stir in a cold pat of butter or a splash of heavy cream. This is known as "mounting" the sauce.
Pro Tip: This is about fat suspension. The cold fat provides a glossy finish and a rich mouthfeel. Note the texture in the step by step photos above; the sauce should be opaque and hold its shape.
The Deep Dive
Macro Nutrition: A standard serving of this dish provides approximately 35 grams of protein and 22 grams of fat. To lower the caloric density, use skinless breasts and thicken the sauce with a cornstarch slurry instead of a flour roux.
Dietary Swaps: For a Keto version, use heavy cream and xanthan gum as a thickener. For a Gluten Free version, a 1:1 GF flour blend works perfectly in a roux, or you can use pureed cauliflower to add body to the sauce.
The Fix-It:
- Lumpy Gravy: If your sauce is clumpy, pour it through a fine mesh sieve or use an immersion blender to aerate and smooth it out.
- Too Salty: Add a splash of heavy cream or a teaspoon of sugar. The fat or sweetness will mask the excess sodium.
- Too Thin: Simmer the sauce without a lid to encourage evaporation, or whisk in a "beurre manie" (equal parts soft butter and flour kneaded together).
Meal Prep: When reheating, the starch in the gravy will have "set" or retrograded. Add a tablespoon of water or broth before microwaving or heating on the stove to loosen the molecular bonds and return the sauce to its original fluidity.
The Wrap-Up
Mastering the best gravy chicken recipes is a rite of passage for any home cook. It is a dish that relies on technique rather than expensive gadgets. By understanding the science of the sear and the stability of the roux, you can create a meal that feels like a warm hug. Remember to taste as you go, trust your senses, and never rush the browning process. Your patience will be rewarded with a sauce so good, you might just want to eat it with a spoon.
The Kitchen Table
How do I keep the chicken skin crispy in gravy?
Sear the skin thoroughly until very crisp. When adding the chicken back to the pan, ensure the liquid only reaches halfway up the meat. This keeps the skin above the "splash zone" so it stays crunchy while the meat braises.
Why is my gravy pale and tasteless?
You likely skipped the browning phase. Ensure your chicken and aromatics develop a deep golden color before adding liquid. This "fond" is the primary source of flavor and color. Using a darker stock can also help improve the visual appeal.
Can I make this recipe in a slow cooker?
Yes, but you must sear the chicken in a skillet first. Transfer everything to the slow cooker, but reduce the liquid by one third. Add a cornstarch slurry during the last thirty minutes of cooking to achieve the desired thickness.
What is the best way to fix broken gravy?
If the fat separates, remove the pan from the heat. Add a tablespoon of very cold water or a splash of room temperature cream and whisk vigorously. This helps re emulsify the fats and liquids into a smooth, cohesive sauce.