
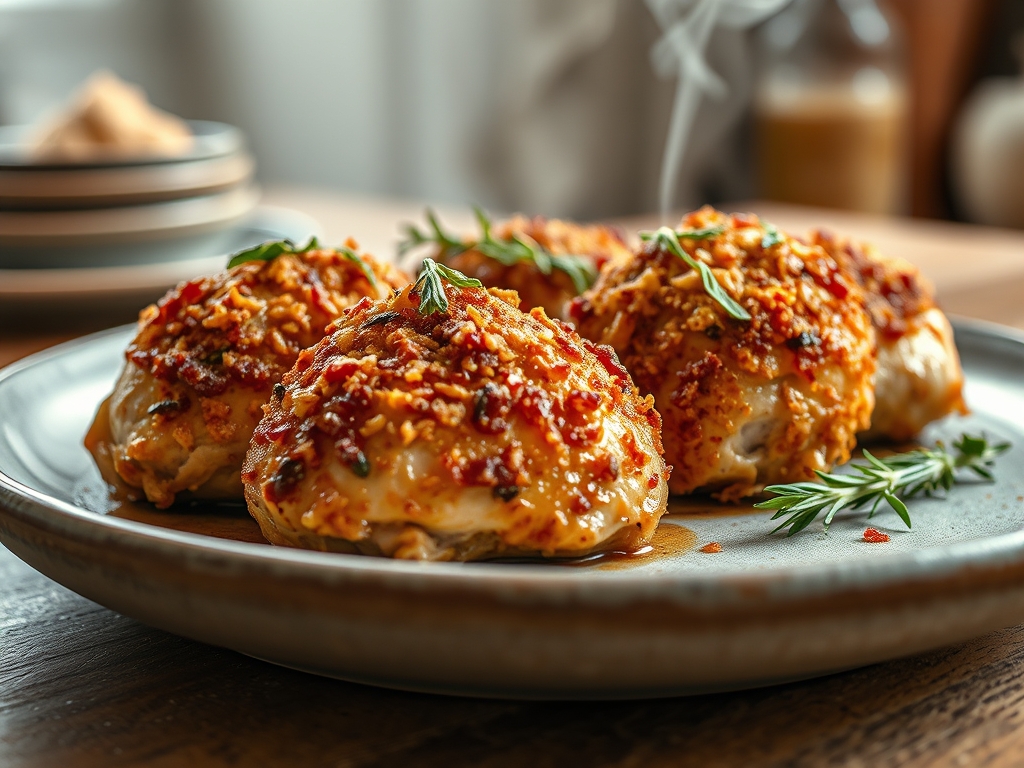
Listen to that sound. It is the distinct, rhythmic crackle of a knife edge dragging across a perfectly golden surface. That is the auditory signature of a culinary masterpiece. When you search for the ultimate crusted baked chicken recipes, you are not just looking for dinner; you are looking for that elusive, shatteringly crisp exterior paired with a center so succulent it defies the dry reputation of poultry.
Getting this right requires more than just a coating of crumbs. It demands an understanding of moisture management and protein denaturation. We are moving past the soggy, pale cutlets of the past. Today, we are engineering a crust that stays structural even under a drizzle of lemon butter. We are balancing the salinity of aged cheese with the heat of smoked paprika to create a flavor profile that is as complex as it is comforting. Grab your digital scale and your favorite heavy-bottomed skillet; we are about to transform a humble chicken breast into a gold-standard centerpiece that will make your kitchen feel like a high-end bistro.
The Gathers:
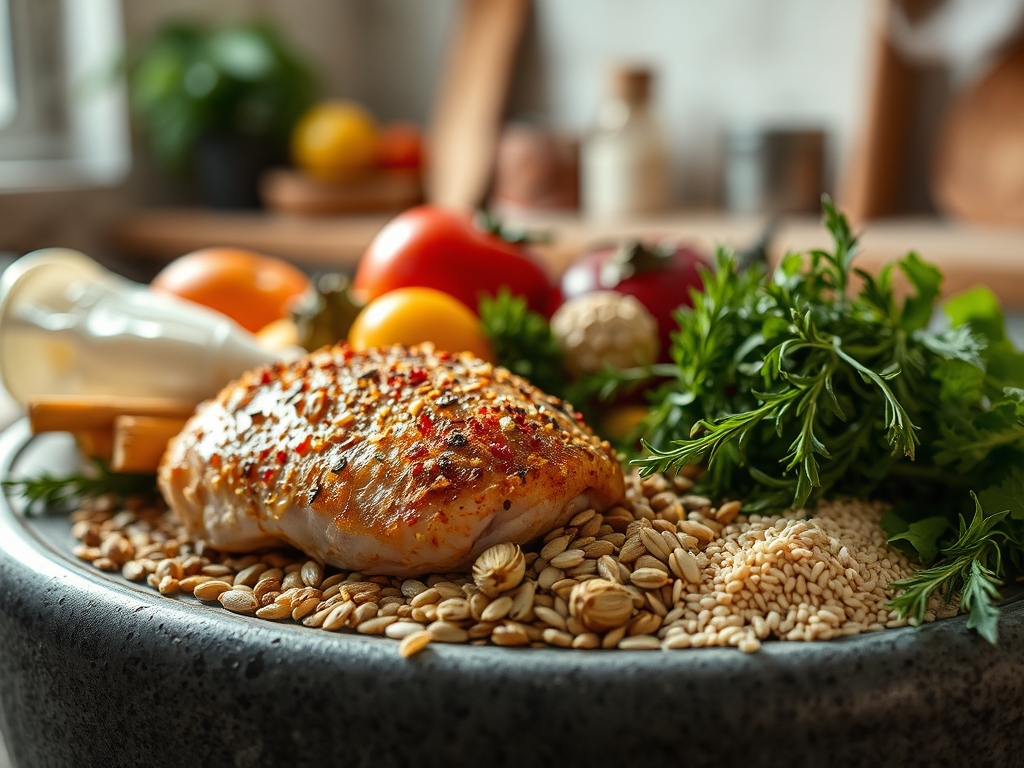
To achieve the texture seen in the photos, your mise-en-place must be precise. Start with six organic chicken breasts, approximately six ounces each. Using a digital scale ensures uniform cooking times. For the crust, you will need two cups of Panko breadcrumbs; these are steamed and dried into large flakes that provide more surface area for the Maillard reaction than traditional fine crumbs.
Combine this with one cup of finely grated Parmigiano-Reggiano. Use a microplane to achieve a cloud-like consistency that melts into the breadcrumbs. For the viscous binding agent, gather three large eggs and a half cup of full-fat Greek yogurt. The lactic acid in the yogurt acts as a mild tenderizer for the protein. Your spice cabinet should yield garlic powder, onion powder, smoked paprika, and kosher salt.
Smart Substitutions: If you are avoiding gluten, crushed pork rinds or almond flour mixed with nutritional yeast provide a similar structural integrity. For a dairy-free profile, swap the parmesan for an equal part of toasted sesame seeds to maintain that essential crunch and nutty fat content.
The Clock
Efficiency in the kitchen is about maintaining a Chef's Flow. This recipe requires twenty minutes of active preparation and twenty-five minutes of oven time.
Prep Time (20 Minutes): This includes the "Standard Breading Procedure." You will set up three shallow bowls. The first holds flour to wick away surface moisture; the second holds the egg and yogurt wash; the third holds the seasoned crumb mixture.
Cook Time (25 Minutes): We bake at 400 degrees Fahrenheit. This high heat is necessary to render any fat in the coating quickly, allowing the crust to set before the interior protein overcooks.
Rest Time (5 Minutes): This is the most ignored yet vital step. It allows for thermal carryover, where the internal temperature rises slightly while the juices redistribute through the muscle fibers.

The Masterclass
1. The Uniformity Phase
Place each chicken breast between two sheets of plastic wrap. Use a heavy meat mallet or the bottom of a heavy-bottomed skillet to pound the meat to an even half-inch thickness. This ensures every part of the chicken reaches the safe internal temperature of 165 degrees Fahrenheit at the exact same moment.
Pro Tip: Even thickness prevents the tapered "tail" of the breast from drying out while the thick center is still raw. This is a lesson in thermal conductivity; uniform mass leads to uniform heat absorption.
2. The Moisture Barrier
Dredge each piece in all-purpose flour seasoned with salt. Shake off every bit of excess until only a fine, dusty film remains. Use a bench scraper to keep your workstation clean during this process.
Pro Tip: The flour acts as an anchor. Without it, the "protein glue" of the egg wash will slip off the smooth surface of the chicken, causing the crust to separate during slicing.
3. The Emulsified Wash
Whisk the eggs and yogurt until the mixture is completely homogenous. Submerge the floured chicken into this viscous liquid, ensuring every nook and cranny is coated. Lift the chicken with tongs and let the excess drip off.
Pro Tip: Yogurt contains fats and proteins that create a thicker "glue" than eggs alone. This prevents the crust from becoming brittle and helps it stay hydrated enough to brown without burning.
4. The Panko Compression
Press the chicken firmly into the Panko and cheese mixture. Do not just sprinkle; use the palm of your hand to physically embed the crumbs into the egg wash. Note the texture in the step-by-step photos below.
Pro Tip: This is called "mechanical adhesion." By pressing the crumbs, you eliminate air pockets that can trap steam, which is the primary enemy of a crispy crusted baked chicken recipe.
5. The Elevated Bake
Place a wire cooling rack inside a rimmed baking sheet. Lightly spray the rack with oil and arrange the chicken so no pieces are touching. Mist the tops of the chicken with olive oil or clarified butter.
Pro Tip: Elevating the meat allows hot air to circulate under the chicken. This prevents the bottom from sitting in its own rendered juices, ensuring a 360-degree crunch through convection.
6. The Final Temp Check
Bake at 400 degrees for 20 to 25 minutes. Use an instant-read thermometer to pull the chicken when it hits 160 degrees. It will reach the final 165 degrees during the rest.
Pro Tip: Thermal carryover is a scientific fact. If you wait until the thermometer hits 165 in the oven, the chicken will actually eat at 170 or higher, resulting in a stringy, dry texture.
The Deep Dive
Macro Nutrition: One serving typically contains 380 calories, 42g of protein, 18g of carbohydrates, and 14g of fat. The high protein content makes this exceptionally satiating.
Dietary Swaps: For a Keto version, use a 1:1 ratio of crushed pork rinds and parmesan cheese for the coating. For a Vegan alternative, use firm tofu pressed for 30 minutes, using a flax-egg and plant-based yogurt as the binder.
The Fix-It:
- Soggy Bottoms: Ensure you are using a wire rack. If the bottom is still soft, increase the oven temp by 25 degrees next time.
- Crust Falling Off: You likely skipped the flour dredge or didn't shake off the excess. The flour must be a thin veil, not a heavy coat.
- Burnt Crumbs/Raw Middle: Your chicken was too thick. Ensure you pound it to a uniform half-inch thickness.
Meal Prep: To reheat and maintain "day-one" quality, avoid the microwave. Use an air fryer at 350 degrees for 4 minutes or a toaster oven. This re-activates the fats in the crust, crisping it back up without toughening the protein.
The Wrap-Up
Mastering crusted baked chicken recipes is a gateway to culinary confidence. It is the perfect marriage of physics and flavor. By controlling moisture, ensuring uniform thickness, and leveraging the power of the Maillard reaction, you have moved beyond simple cooking into the realm of food science. Serve this with a bright arugula salad or a saucier filled with a piquant lemon-caper reduction. Your kitchen now produces results that rival any professional line cook.
The Kitchen Table
Why is my chicken crust soggy after baking?
Sogginess usually occurs when steam gets trapped between the meat and the crust. Using a wire rack for elevation allows air to circulate underneath, preventing the chicken from "stewing" in its own released moisture during the baking process.
Can I make this recipe ahead of time?
You can bread the chicken up to four hours in advance. Store it uncovered in the refrigerator on a wire rack. This actually helps the crust "set" and can result in an even crispier finish once it hits the oven.
What is the best temperature for baked crusted chicken?
A temperature of 400 degrees Fahrenheit is ideal. It is high enough to quickly dehydrate the outer crumbs for maximum crunch while being fast enough to cook the interior protein before it has a chance to lose its natural cellular moisture.
How do I keep the breading from falling off?
Follow the "Dry-Wet-Dry" rule. Flour (dry) sticks to the meat; egg wash (wet) sticks to the flour; crumbs (dry) stick to the egg. Skipping the flour or having too much excess egg wash are the most common causes of coating failure.