
Imagine the sound of cold, rendered duck fat hitting a blistering heavy-bottomed skillet; it is a sharp, percussive snap that signals the start of a culinary transformation. When you master carnivore chicken recipes, you are not just cooking; you are conducting a symphony of amino acids and thermal energy to create something primal yet sophisticated. Chicken often gets a reputation for being the "boring" protein in the animal kingdom, but that is a failure of technique, not the bird. By focusing on high-quality fats and precise heat management, we can elevate this lean protein into a decadent, nutrient-dense masterpiece that satisfies the most rigorous carnivorous cravings while providing a texture that is nothing short of addictive.
The Gathers:
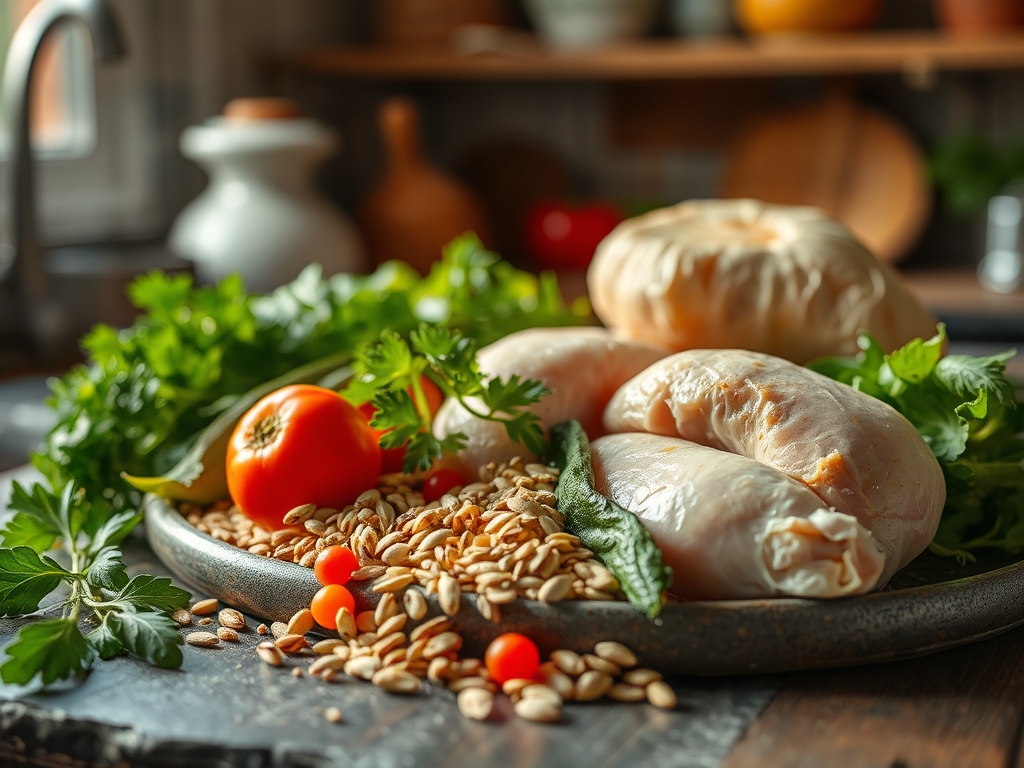
To execute these nine bold variations, your mise-en-place must be impeccable. Start with the bird: we are looking for organic, air-chilled thighs and skin-on breasts. Air-chilling is vital because it prevents water absorption; excess moisture is the enemy of the Maillard reaction, the chemical process where denatured proteins and sugars create that golden-brown crust. You will need a high-quality animal fat like tallow, lard, or clarified butter (ghee) to act as your heat transfer medium. These fats have high smoke points, meaning they won't oxidize and become bitter when you crank up the BTU.
Gather your specialized tools: a digital scale for precision, a microplane for shaving frozen butter over hot meat, and a saucier for emulsifying pan juices. If you are looking for smart substitutions to keep things strictly carnivore, swap traditional flour coatings for crushed pork rinds or a dusting of egg white powder. These alternatives provide a structural matrix that mimics breading without the inflammatory carbohydrates. Always have a bowl of flaky sea salt ready; the crystalline structure provides a tactile crunch that enhances the viscous mouthfeel of the rendered fats.
The Clock
Efficiency in the kitchen is about understanding the "Chef's Flow." For these carnivore chicken recipes, the clock starts with a 30-minute room temperature rest for the meat. This ensures the internal fibers aren't shocked by the heat, which leads to tightening and juice loss. Prep time is minimal, usually around 15 minutes of trimming and seasoning. The cook time varies from a quick 8-minute sear for thin cutlets to a 45-minute slow roast for bone-in pieces. Total "active" time is roughly 25 minutes per dish. The flow involves prepping your fat source while the pan preheats, searing the protein, and using the resting period to deglaze the pan for a supplemental fat-bomb sauce.
The Masterclass
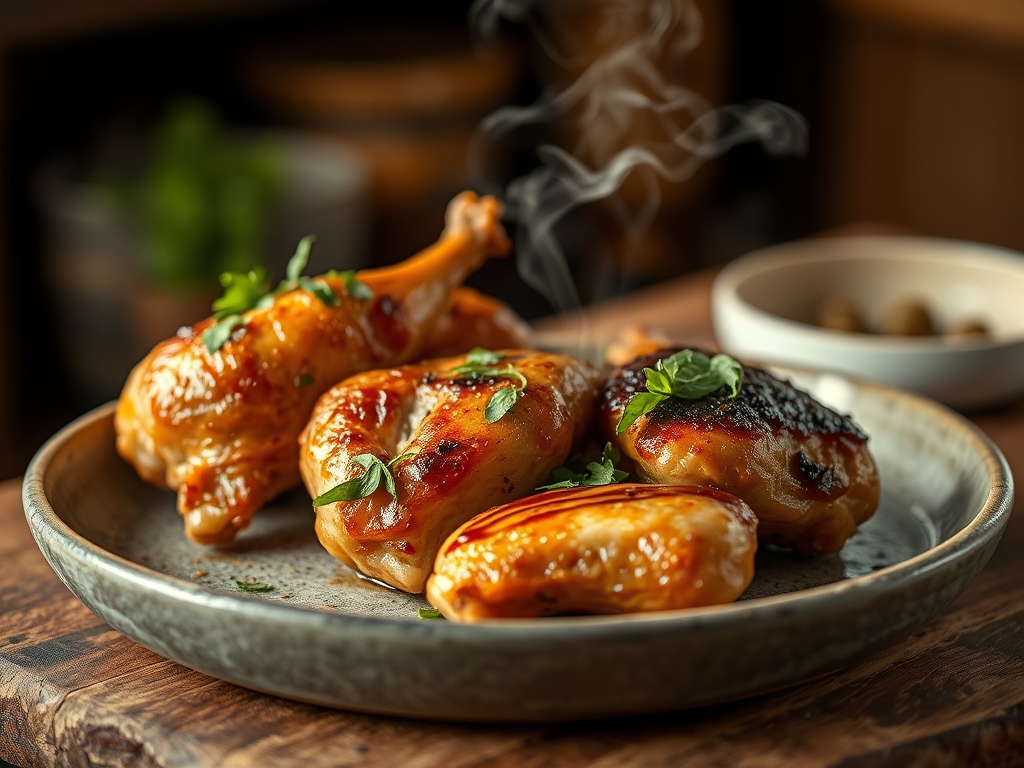
1. The High-Heat Sear
Place your chicken skin-side down in a cold skillet and gradually raise the heat. This method allows the subcutaneous fat to render slowly, resulting in a glass-like crispness rather than a rubbery texture. Use your tongs to press the meat flat against the surface for maximum contact.
Pro Tip: This technique utilizes conduction, where heat moves directly from the metal to the fat. By starting cold, you prevent the skin from shrinking too quickly, which preserves the aesthetic integrity of the dish.
2. The Butter Basting Technique
Once flipped, add a generous knob of cold butter and a sprig of thyme (if your version of carnivore allows for aromatics). Use a large spoon to continuously drench the chicken in the foaming fat. This is known as arroser.
Pro Tip: Basting creates a "micro-convection" environment. The hot fat cooks the nooks and crannies of the meat while the milk solids in the butter undergo enzymatic browning, adding a nutty profile to the protein.
3. The Salt-Brine Cure
For the juiciest results, salt your chicken at least four hours in advance. This allows the salt to penetrate the muscle fibers through osmosis, altering the protein structure so it can hold more moisture during the cooking process.
Pro Tip: This is a "dry brine." It dries out the surface of the skin while hydrating the interior. A dry surface is essential for achieving a piquant crunch without the need for starches.
4. The Sous Vide Finish
For the ultimate precision, seal your chicken in a vacuum bag with tallow and cook at 145 degrees Fahrenheit for two hours. Finish with a 60-second sear in a smoking hot cast-iron pan.
Pro Tip: This prevents thermal carryover, where the internal temperature continues to rise after the meat is removed from the heat. It ensures the chicken stays at the perfect molecular state of tenderness.
5. The Egg-Wash Emulsion
Dip your chicken in a whisked egg yolk bath before "breading" with crushed pork rinds. The lecithin in the yolk acts as an emulsifier, helping the fats and proteins bond together for a seamless crust.
Pro Tip: Egg yolks contain high levels of phospholipids. When heated, these create a stable barrier that prevents the chicken from drying out while providing a rich, viscous coating.
The Deep Dive
From a macro nutrition perspective, these carnivore chicken recipes are a powerhouse. A standard 6-ounce serving provides roughly 45 grams of high-bioavailability protein and 20 to 30 grams of healthy animal fats. While the carnivore diet is the focus, these meals are naturally Gluten-Free and Keto-friendly. For a "vegan" swap, one would have to replace the chicken with a high-protein soy isolate, though the flavor profile and nutrient density would be significantly altered.
The Fix-It: Technical Solutions
- The Problem: The skin is sticking to the pan. The Fix: You likely tried to flip it too early. Protein undergoes "release" once the Maillard reaction is complete. Wait for the meat to naturally detach.
- The Problem: The chicken is dry and "stringy." The Fix: This is over-coagulation of the proteins. Use a digital thermometer and pull the meat at 160 degrees; carryover heat will bring it to the safe 165-degree mark.
- The Problem: The fat is smoking and smelling acrid. The Fix: Your heat is above the smoke point. Immediately add a splash of room-temperature fat or remove the pan from the burner to lower the temperature.
Meal Prep & Reheating
To maintain "day-one" quality, avoid the microwave. Microwaves vibrate water molecules, which can turn your crispy chicken into a soggy mess. Instead, reheat in an air fryer or under a broiler for 3 to 5 minutes. This re-activates the fats and restores the structural integrity of the skin.
The Wrap-Up
Mastering carnivore chicken recipes is your ticket to a high-energy, low-inflammation lifestyle that doesn't sacrifice the joy of a gourmet meal. By understanding the physics of heat and the chemistry of animal fats, you turn a simple bird into a culinary triumph. Grab your heavy-bottomed skillet, trust the science of the sear, and enjoy the most succulent protein of your life. You have the tools; now go make some magic!
The Kitchen Table
Can I use chicken breast for a carnivore diet?
Yes, but since breasts are lean, you must supplement with high-quality animal fats. Use techniques like butter basting or adding a side of tallow-based sauce to ensure you are hitting your necessary fat-to-protein macros for satiety.
What is the best fat for frying chicken?
Beef tallow or leaf lard are the gold standards. They have high smoke points and provide a neutral, savory flavor profile. Clarified butter (ghee) is also excellent if you tolerate dairy, as it won't burn at high temperatures.
How do I get crispy skin without flour?
The secret is moisture control. Air-dry your chicken in the fridge uncovered for 24 hours. The dry skin will undergo the Maillard reaction much faster, creating a shatteringly crisp texture using only the bird's natural proteins and fats.
Is pink chicken ever safe to eat?
If you use a sous vide machine, chicken cooked at 145 degrees for a prolonged period is pasteurized and safe, even if it looks slightly pink. However, for traditional methods, always use a thermometer to reach 165 degrees.