
Picture a slab of Atlantic salmon, its flesh a vibrant coral, glistening under a thin veil of cold-pressed olive oil. As the oven door clicks shut, the kitchen transforms into a laboratory of aroma where the heat begins to render subcutaneous fats into a silky, decadent glaze. Finding great salmon recipes baked at home often feels like a gamble between raw centers and chalky overcooked fibers. However, the secret lies in the intersection of thermal dynamics and protein structure. We are not just cooking dinner; we are orchestrating a precise biochemical reaction that turns a simple fillet into a masterpiece of texture. By understanding how heat penetrates the lamellae, the thin layers of muscle tissue, you can achieve that elusive restaurant quality flake every single time. This guide is your backstage pass to the ultimate savory experience, blending high-end culinary techniques with the warmth of a shared meal.
The Gathers:
The mise-en-place for a superior bake starts with the quality of the lipids and the profile of the aromatics. You will need a high-quality side of salmon, preferably center-cut for uniform thickness. Gather your microplane for zesting, a digital scale for precise seasoning, and a saucier to prepare your infusion.
The ingredient list includes:
- Fresh Salmon Fillet: Look for clear, bright eyes if whole, or firm, translucent flesh if filleted.
- Unsalted European Butter: This has a lower water content, allowing for a more viscous and rich mouthfeel.
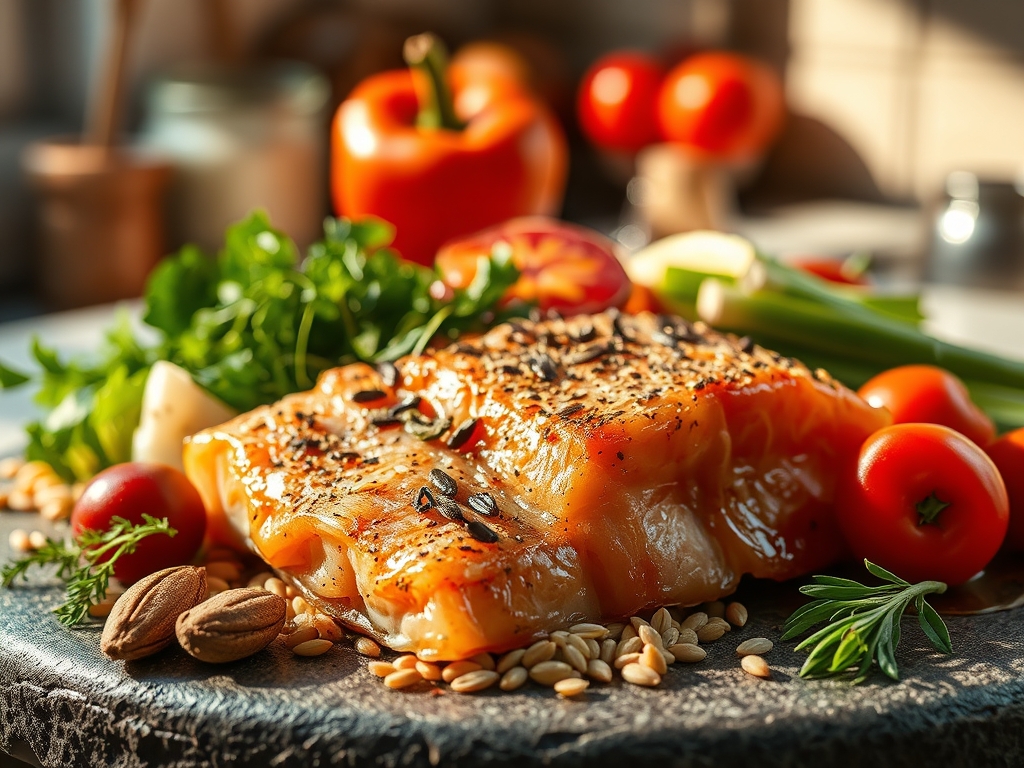
- Aromatics: Fresh dill, garlic cloves, and shallots. These contain volatile oils that infuse the fat during the bake.
- Acid: Fresh lemon juice and a splash of dry white wine to deglaze the palate.
- Seasoning: Flaky sea salt and cracked black peppercorns.
Smart Substitutions: If you are avoiding dairy, swap the butter for an emulsified avocado oil. It has a high smoke point and provides a similar creamy texture. For a piquant twist, replace lemon with lime and add a teaspoon of grated ginger to the rub.
The Clock
Efficiency in the kitchen is about the Chef's Flow. Total preparation time is approximately 15 minutes, while the active cook time spans 12 to 18 minutes depending on the thickness of the protein.
The flow begins with the "Tempering Phase." Take your salmon out of the refrigerator 20 minutes before cooking. This prevents a thermal shock where the exterior overcooks while the interior remains icy. While the fish tempers, preheat your oven to 375 degrees Fahrenheit. This temperature is the "sweet spot" for great salmon recipes baked to perfection; it is hot enough to trigger the Maillard reaction on the surface but gentle enough to keep the internal moisture intact.
The Masterclass
1. The Surface Preparation
Pat the salmon bone-dry using lint-free paper towels. Moisture is the enemy of a good sear or bake; surface water creates steam, which results in a rubbery texture rather than a crisp finish. Use a bench scraper to ensure the skin side is free of any residual scales or moisture.
Pro Tip: This process is called desiccating the surface. By removing moisture, you allow the heat to immediately begin browning the proteins rather than wasting energy evaporating water.
2. The Infusion Bath
In your saucier, melt the butter over low heat. Add minced garlic and shallots, allowing them to soften without browning. This is a gentle poaching of the aromatics. Once fragrant, whisk in your herbs and citrus.
Pro Tip: This is a lipid-based flavor delivery system. Many flavor compounds in herbs are fat-soluble, meaning they need a medium like butter to effectively infuse the meat of the fish.
3. The Seasoning Layer
Apply a generous coating of sea salt from a height of about twelve inches. This ensures an even distribution of granules. Use your microplane to shower the fish with fresh lemon zest, which adds a bright, floral top note without the harsh acidity of the juice.
Pro Tip: Salt acts as a denaturant. It begins to break down the tight protein structures on the surface, allowing the seasonings to penetrate deeper into the muscle fibers.
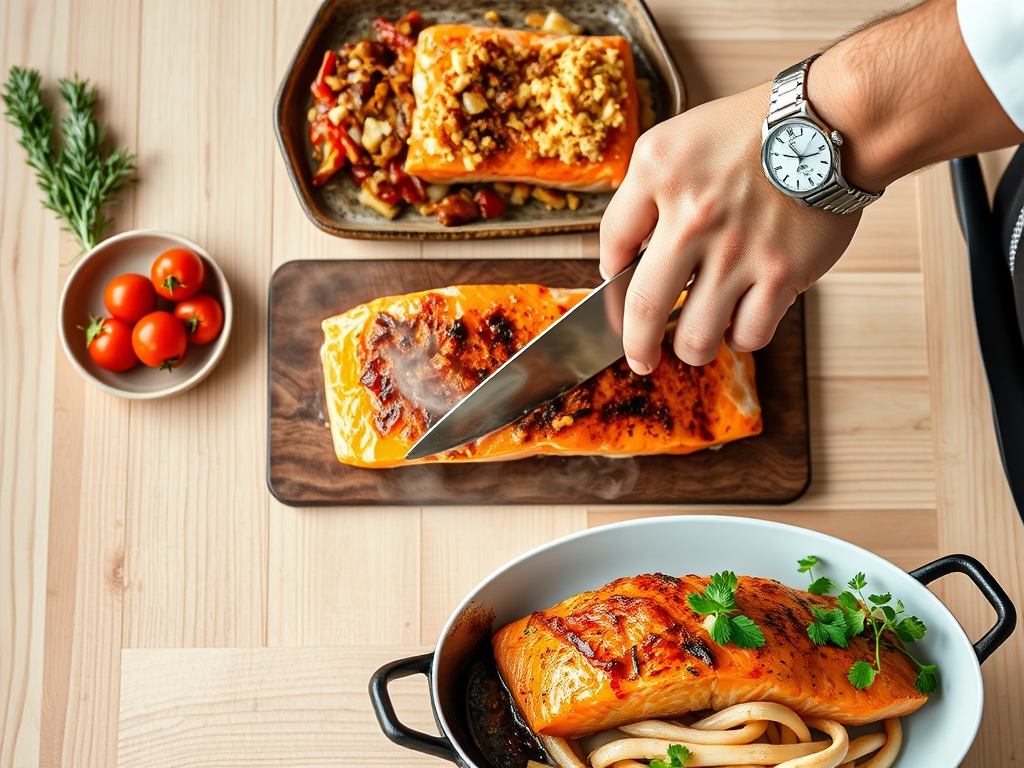
4. The Thermal Application
Place the salmon on a parchment-lined heavy-rimmed baking sheet. Pour the infused butter over the top. Slide it into the center rack of the oven. If you have a digital probe thermometer, set the alert for 125 degrees Fahrenheit for a perfect medium-rare.
Pro Tip: Use a heavy baking sheet to ensure even heat distribution. Thin pans can warp, causing hot spots that lead to uneven cooking and "albumin bleed," those white protein spots that leak out when fish is cooked too fast.
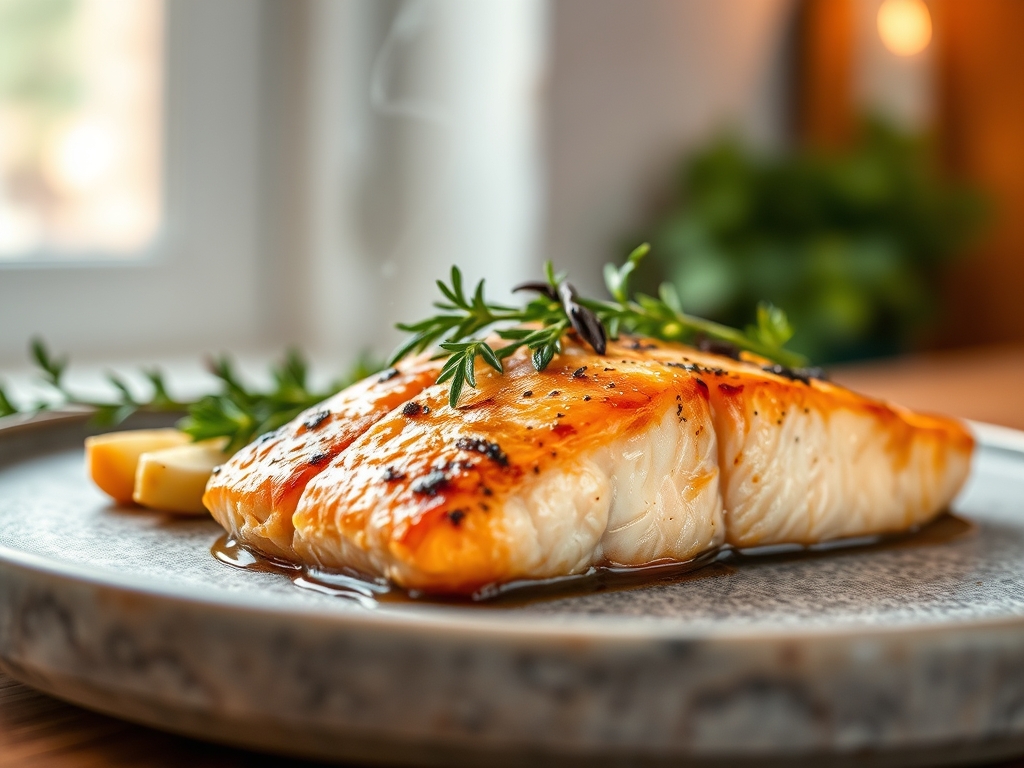
5. The Glaze and Finish
Five minutes before the timer ends, use a spoon to baste the salmon with the juices collected on the parchment. This re-hydrates the surface and creates a shimmering, professional aesthetic.
Pro Tip: This technique, known as arroser, utilizes the rendered fats to create a protective barrier, locking in the internal juices through the final stage of the cook.
6. The Resting Period
Remove the salmon from the oven and tent it loosely with foil. Let it rest for at least five minutes before serving. Use tongs to gently check the flake; it should yield easily to light pressure.
Pro Tip: This accounts for thermal carryover. The internal temperature will continue to rise by 5 to 7 degrees after removal. Resting allows the muscle fibers to relax and reabsorb the juices.
The Deep Dive
Macro Nutrition: Salmon is a nutritional powerhouse, rich in Omega-3 fatty acids (EPA and DHA), which are essential for brain health. A 6-ounce portion typically provides 40 grams of high-quality protein and zero carbohydrates, making it a staple for metabolic health.
Dietary Swaps:
- Vegan: Use the same aromatic infusion method on a "steak" of cauliflower or a firm block of tofu.
- Keto: This recipe is naturally ketogenic. Increase the butter ratio for higher fat macros.
- Gluten-Free: Ensure your spices are certified GF, though the core ingredients are naturally safe.
The Fix-It:
- The White Stuff (Albumin): If you see white goop, the oven is too hot. Fix it by lowering the temp and basting immediately to cool the surface.
- Soggy Skin: The pan wasn't preheated or the skin wasn't dry. Fix it by finishing the fish under the broiler for 60 seconds.
- Dry Texture: You skipped the resting phase. Fix it by serving with an extra drizzle of the butter infusion from the pan.
Meal Prep Science: To reheat without losing quality, avoid the microwave. Use a low-heat oven (275 degrees) with a splash of water in the pan to create a gentle steam environment. This prevents the proteins from tightening and becoming tough.
The Wrap-Up
Mastering great salmon recipes baked in your own kitchen is about more than just following a list; it is about respecting the ingredients and the physics of heat. When you see those beautiful, fatty flakes separate under your fork, you will know you have transitioned from a home cook to a culinary scientist. Share this meal with someone you love, pour a crisp glass of Sauvignon Blanc, and enjoy the savory rewards of your precision.
The Kitchen Table
How do I know when baked salmon is done?
The most reliable method is using a digital thermometer to reach an internal temperature of 125 to 130 degrees Fahrenheit. Visually, the flesh should be opaque and flake easily when pressed with a fork or a dull knife.
Why does my salmon have white stuff on it?
That white substance is called albumin. It is a harmless protein that gets pushed out of the muscle fibers when the fish is cooked too quickly or at a temperature that is too high. Lower your heat for a cleaner look.
Can I bake salmon from frozen?
While possible, it is not recommended for the best texture. Thawing allows for even heat penetration. If you must, wrap it tightly in foil to steam the interior while it thaws during the initial baking process.
What is the best rack position for baking fish?
The center rack is ideal for salmon. It provides the most consistent ambient heat. If you want a crispier top, move it to the top rack for the final two minutes of cooking under the broiler setting.
Should I leave the skin on while baking?
Yes, always. The skin acts as a thermal barrier between the hot pan and the delicate flesh. It also contains a layer of fat that renders during the bake, adding moisture and flavor to the entire fillet.